 Save
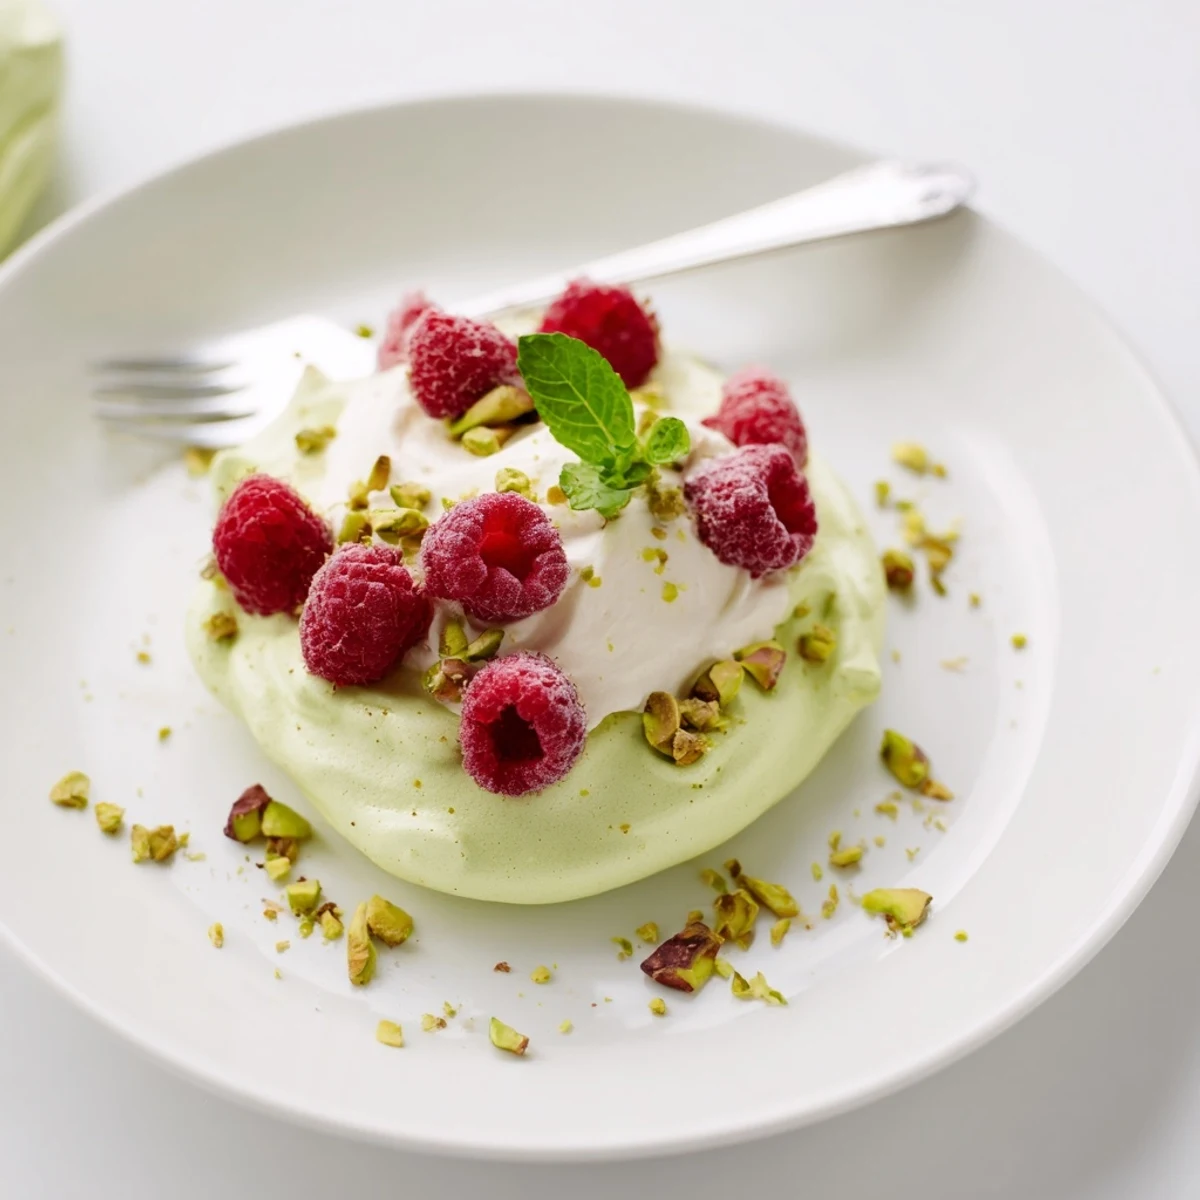
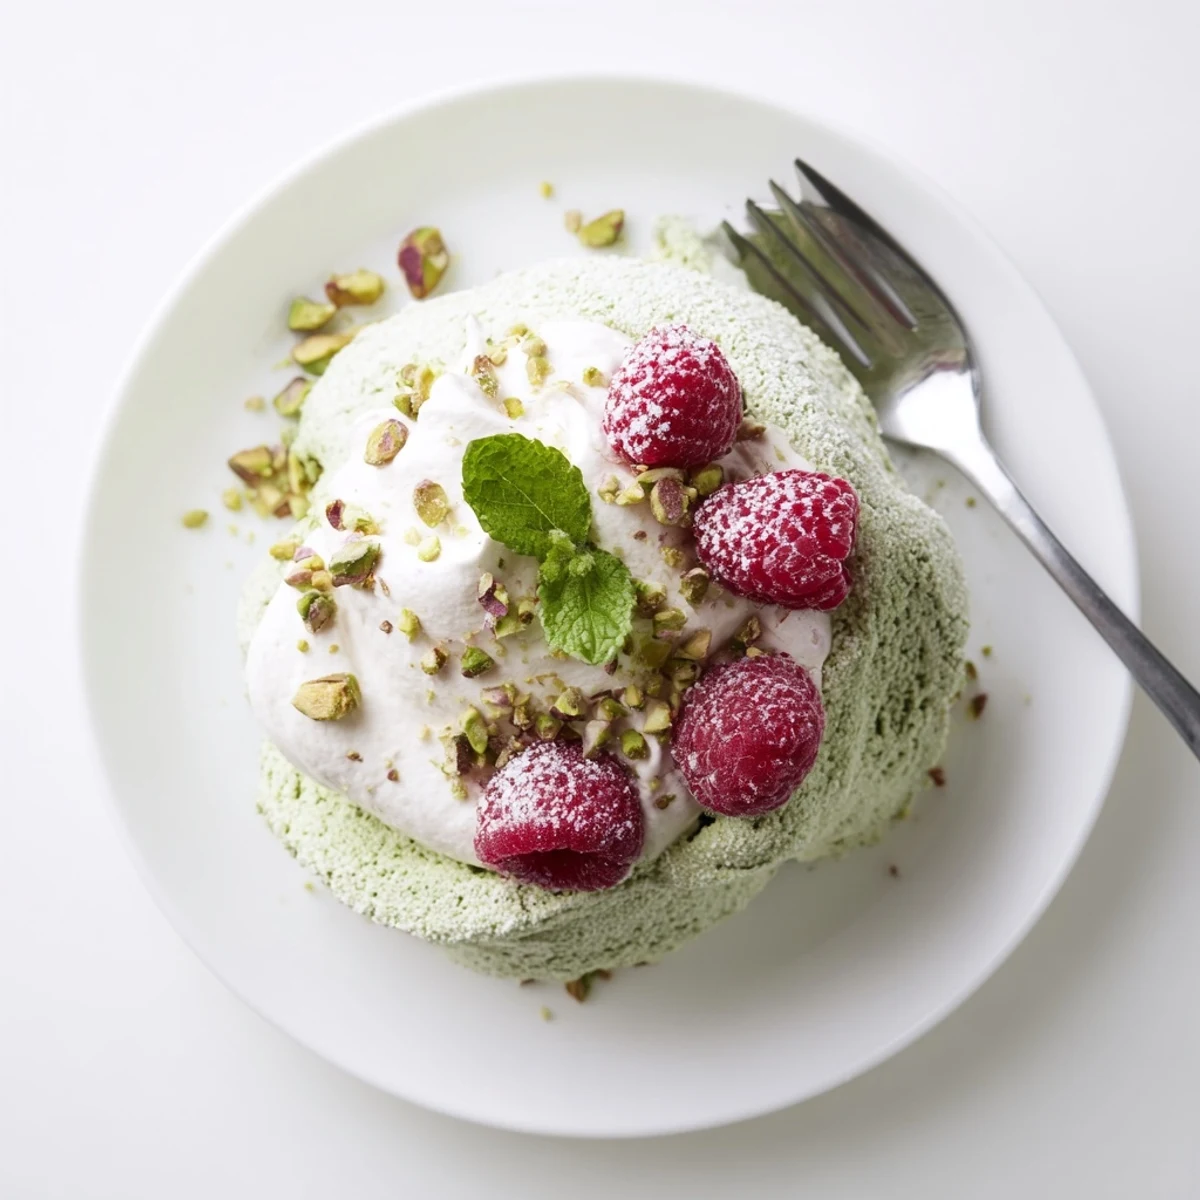
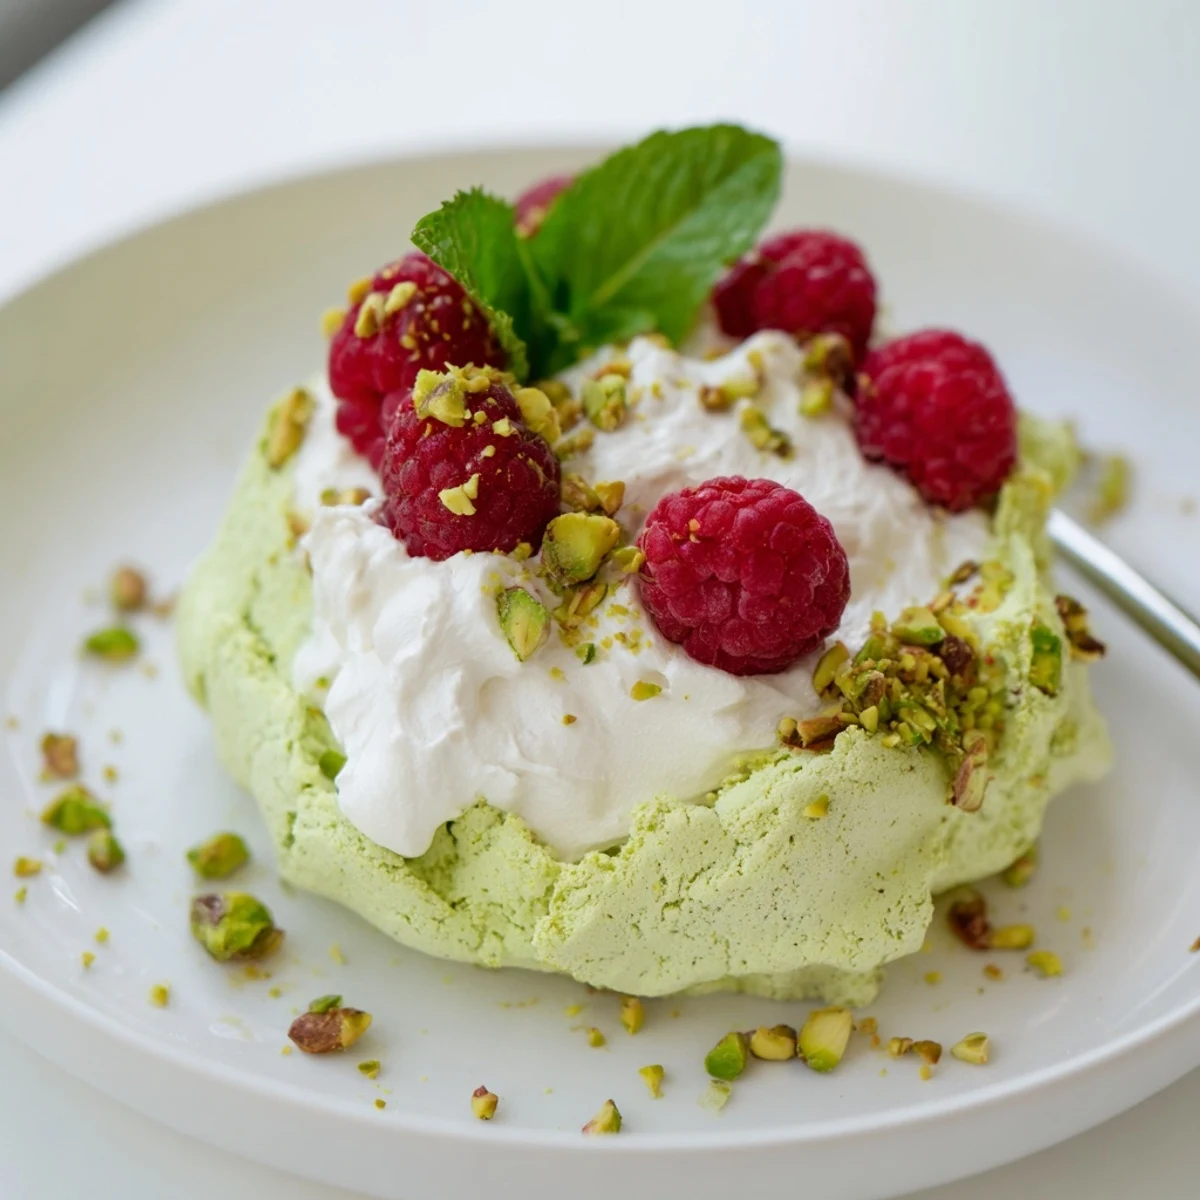
Save These delicate meringue nests combine the nutty richness of ground pistachios with the natural sweetness of fresh raspberries. The crisp, cloud-like shells bake slowly at low temperature, creating the perfect canvas for lightly sweetened whipped cream. Each bite delivers a satisfying contrast between the airy exterior and lush filling, making this an ideal finale for spring gatherings or when you crave something impressively beautiful yet wonderfully light.
The kitchen was unusually quiet that Sunday afternoon when I first attempted meringue, the only sound the rhythmic whir of my electric mixer and rain tapping against the window pane. I had always been intimidated by the chemistry of egg whites and sugar, but watching those glossy peaks form felt like witnessing pure alchemy. The moment I folded in the ground pistachios, catching that faint nutty aroma, I knew this was going to be something special. That evening, serving these delicate nests to friends who couldn't stop asking how I achieved such perfection, I realized that sometimes the most elegant desserts are also the most wonderfully simple.
Last spring, I made these for my mother's birthday instead of a traditional cake, watching her face light up as she took that first bite of crisp pistachio scented shell meeting the tangy sweetness of fresh berries. The conversation around the table paused for just a moment, everyone caught off guard by how something so light could feel so indulgent. I have since learned to always make extra because inevitably, someone will ask for seconds before the plates are even cleared.
Ingredients
- 4 large egg whites: Room temperature whites whip up to greater volume and create a more stable meringue structure
- 1 cup (200 g) granulated sugar: Added gradually, this creates that characteristic glossy finish and helps stabilize the egg white foam
- 1/2 teaspoon cream of tartar: The secret weapon that helps your meringue hold its shape and prevents weeping during baking
- 1/2 teaspoon vanilla extract: Adds a warm, aromatic background note that complements the nutty pistachio flavor
- 1/2 cup (60 g) unsalted pistachios, finely ground: Pulse these carefully in a food processor, as over processing will turn them into paste rather than fine crumbs
- 1 cup (240 ml) heavy whipping cream: Cold whipping cream is essential for achieving stable peaks that hold up beautifully inside the meringue nests
- 2 tablespoons powdered sugar: Sweetens the cream without adding graininess, plus helps stabilize the whipped cream structure
- 1 teaspoon vanilla extract: A classic pairing with both cream and berries that ties all the flavors together
- 1 1/2 cups (180 g) fresh raspberries: Choose plump, deeply colored berries and handle them gently to avoid crushing their delicate structure
- 1/4 cup (30 g) unsalted pistachios, coarsely chopped: These provide a lovely crunch and visual pop of green against the pink berries and white cream
- Fresh mint leaves: An optional garnish that adds a fresh herbal note and makes the final presentation absolutely stunning
Instructions
- Prepare your baking space:
- Preheat your oven to 225°F (110°C) and line two baking sheets with parchment paper, tracing eight 3-inch circles if you want perfectly sized nests
- Whip the egg whites:
- In a completely clean and dry bowl, beat the egg whites until foamy, then add cream of tartar and continue until soft peaks form
- Add sugar gradually:
- While continuing to beat, add the granulated sugar one tablespoon at a time, waiting until each addition is dissolved before adding the next
- Achieve glossy peaks:
- Continue beating until the mixture forms stiff, glossy peaks that hold their shape when the beaters are lifted
- Flavor the meringue:
- Gently fold in the vanilla extract, taking care not to deflate all those beautiful air bubbles you have worked to create
- Incorporate the pistachios:
- Using a spatula, carefully fold in the finely ground pistachios until just combined, being gentle to maintain the meringues volume
- Shape the nests:
- Spoon or pipe the meringue into 8 nests on your prepared baking sheets, using the back of a spoon to create a shallow well in each center
- Bake slowly:
- Bake for 1 hour 30 minutes, rotating the trays halfway through, until the nests are completely dry to the touch
- Cool gradually:
- Turn off the oven, crack the door slightly, and let the nests cool completely inside, which prevents cracking from sudden temperature changes
- Prepare the cream:
- Whip the cold heavy cream with powdered sugar and vanilla extract until soft peaks form
- Assemble the dessert:
- Fill each cooled meringue nest with a generous dollop of whipped cream
- Add the finishing touches:
- Top each nest with fresh raspberries and sprinkle with coarsely chopped pistachios, adding a mint leaf if you want that extra touch of elegance
 Save
Save These nests have become my go to dinner party ending because they can be prepared ahead yet still feel impressive and fresh at serving time. I love watching guests break through that crisp shell, their eyes widening at the combination of textures and flavors that somehow manages to be both sophisticated and comforting.
Making Meringue Humidity Proof
I once attempted these during a particularly rainy July weekend and learned the hard way that moisture is meringues worst enemy. The shells never quite achieved that satisfying crunch, turning slightly chewy instead of the ethereal crispness I was aiming for. Now I check the weather forecast before planning meringue based desserts, or run the air conditioning to reduce humidity in the kitchen.
The Art of Perfect Whip
After years of over whipping cream into grainy disappointment, I finally learned to stop the mixer just as soft peaks begin to form. The cream should still look slightly fluid and will continue to firm up as you fold it or spread it into the nests. This gentle approach yields a cream that stays silky smooth rather than developing that unpleasant buttery texture that comes from over mixing.
Assembly Timing Secrets
Fill the meringue nests with cream no more than an hour before serving, as the moisture will eventually start to soften the crisp shell. The pistachios and raspberries should be added at the very last moment for maximum freshness and visual appeal.
- Keep your baked meringue nests in an airtight container for up to two days before filling
- Prepare the whipped cream just before you plan to assemble the final dessert
- Wash and dry the raspberries gently but thoroughly, then let them air dry on paper towels to prevent excess moisture from making the meringue soggy
 Save
Save There is something deeply satisfying about creating such an elegant dessert from such humble ingredients, watching it come together like a little work of edible art. I hope these pistachio raspberry meringue nests bring as much joy to your table as they have to mine.
Recipe Questions
- → Can I make meringue nests ahead of time?
-
Yes, the unfilled meringue shells can be prepared up to one day in advance. Store them in an airtight container at room temperature. Fill with whipped cream and raspberries just before serving to maintain the crisp texture.
- → Why do I need cream of tartar in meringue?
-
Cream of tartar stabilizes the egg whites, helping them hold their shape during baking. It also prevents the sugar from crystallizing and ensures the meringue maintains its volume and glossy finish throughout the long baking process.
- → What temperature should egg whites be for meringue?
-
Room temperature egg whites whip to greater volume than cold ones. Remove them from the refrigerator about 30 minutes before beating. This temperature allows the proteins to unfold more easily, creating a stable foam with better structure.
- → Can I use other fruits instead of raspberries?
-
Absolutely. Fresh strawberries, sliced or whole, work beautifully. You can also use blueberries, blackberries, or a mix of seasonal berries. The tartness of the fruit balances the sweet meringue and rich whipped cream perfectly.
- → How do I know when meringue nests are done?
-
The nests are ready when they feel dry to the touch and lift easily from the parchment paper without sticking. They should sound hollow when tapped gently. The slow, low-temperature baking removes moisture without browning the delicate meringue.
- → Why cool meringue in the oven?
-
Cooling gradually in the turned-off oven prevents the meringue from cracking due to sudden temperature changes. This gentle cooling process helps maintain the crisp texture and structural integrity of your delicate nests.