 Save
Save Whip room-temperature egg whites with cream of tartar until soft peaks, then add sugar gradually and beat to stiff, glossy peaks. Stir in salt and vanilla, paint red and blue stripes inside a piping bag, fill carefully and pipe 1–1.5 inch kisses. Bake low at 200°F (90°C) for 1 hour 15 minutes until dry, then cool in the turned-off oven for 1 hour to intensify crispness. Store airtight at room temperature up to five days.
Nothing signals summer’s arrival in my kitchen quite like the pop and swirl of food coloring in a bowl of glossy meringue. The first time I made these patriotic meringue kisses, upbeat music was playing, and the sweet aroma of vanilla danced over the counter as I attempted perfect peaks. My hands wobbled piping the stripes, but the messy swirls ended up looking even more festive than planned. Sometimes, the best treats come from letting loose with a little color and joy.
I made a gigantic batch of these for a backyard Fourth of July picnic, and the kids hovered, hoping to catch one right off the tray. Someone yelled out that they looked like edible fireworks and we all agreed the best part was comparing whose lips became the brightest shade of red or blue.
Ingredients
- Egg whites: Room temperature egg whites whip up with more volume and fewer lumps, so I always set mine out early.
- Granulated sugar: Adding sugar slowly is key for that crisp, melt-on-the-tongue shell—rush it, and you end up with grainy meringues.
- Cream of tartar: This tiny touch helps stabilize the peaks and keeps things fluffy, especially on humid days.
- Salt: Just a sprinkle balances the sweetness and lets vanilla shine through.
- Vanilla extract: The smallest dash adds a warm fragrance, which comes through even after baking.
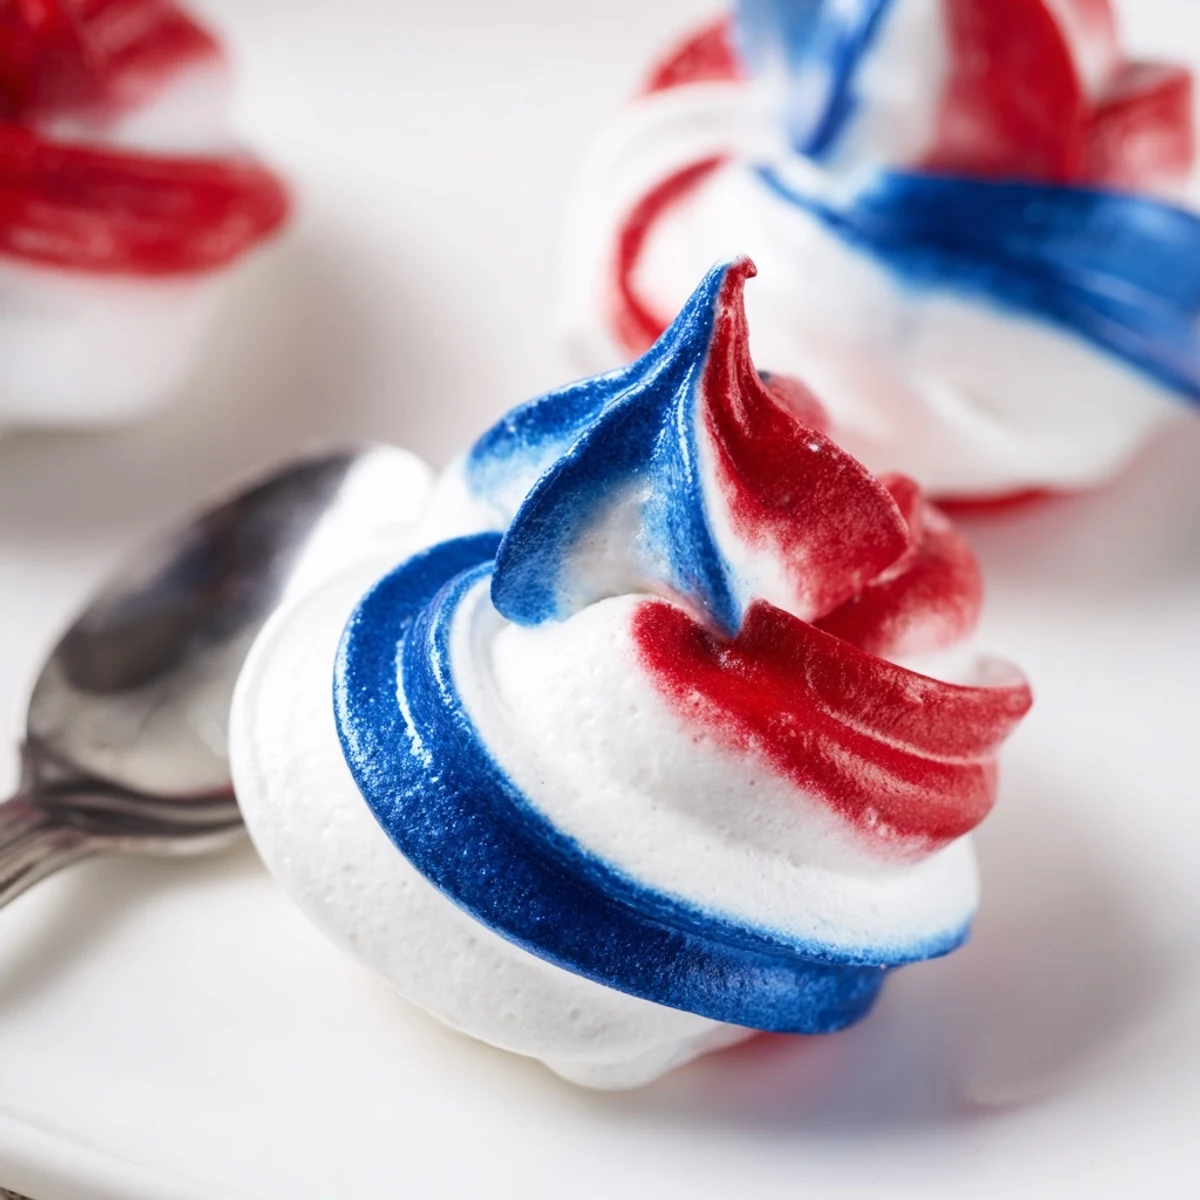
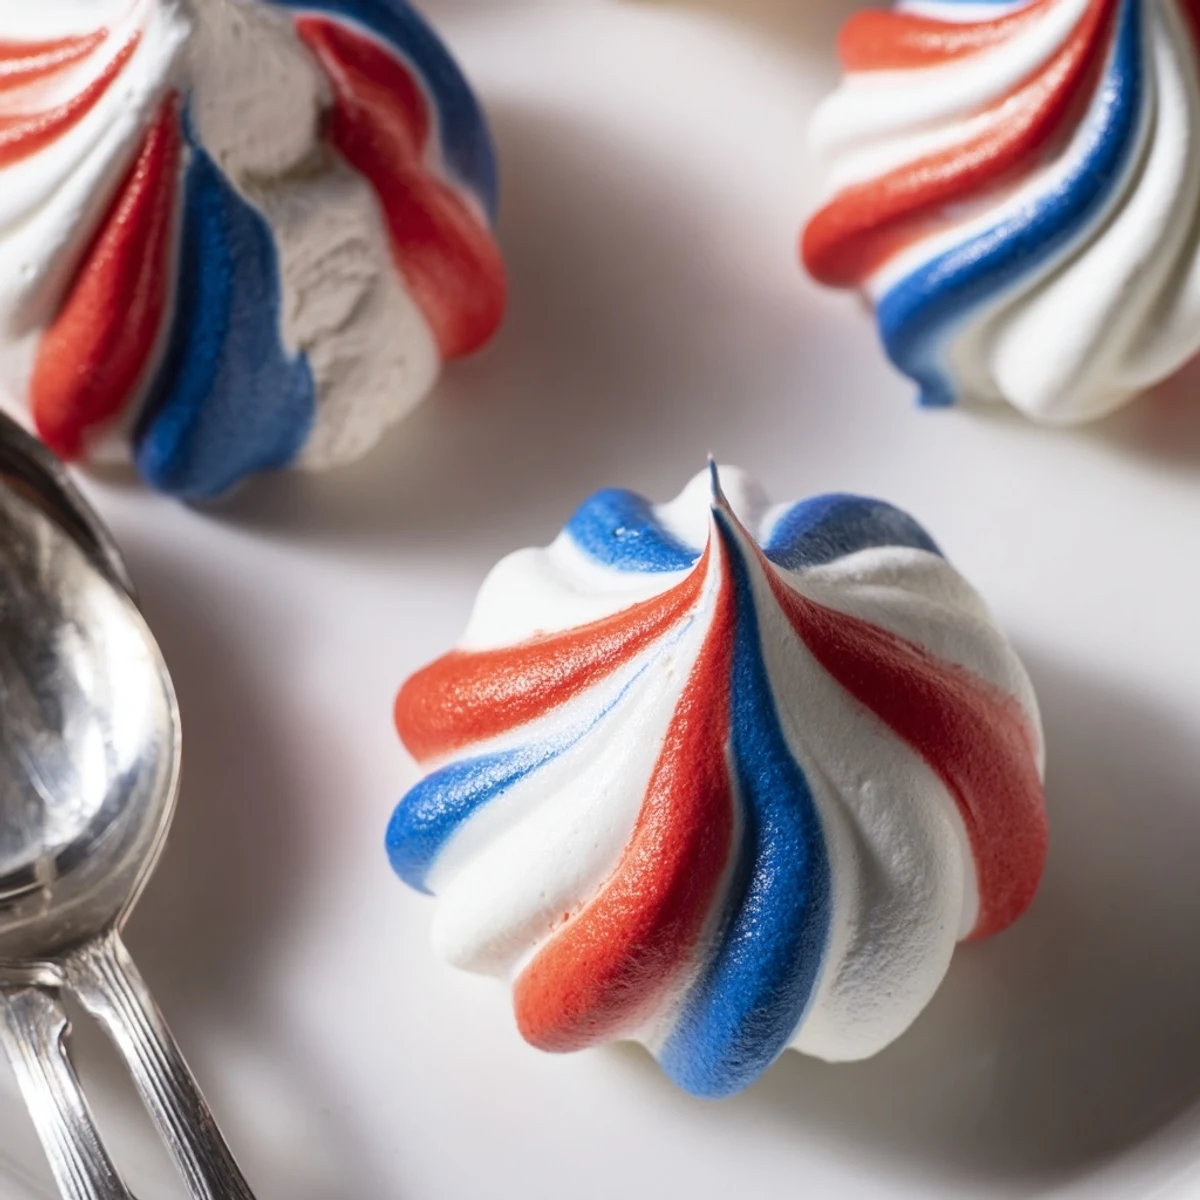
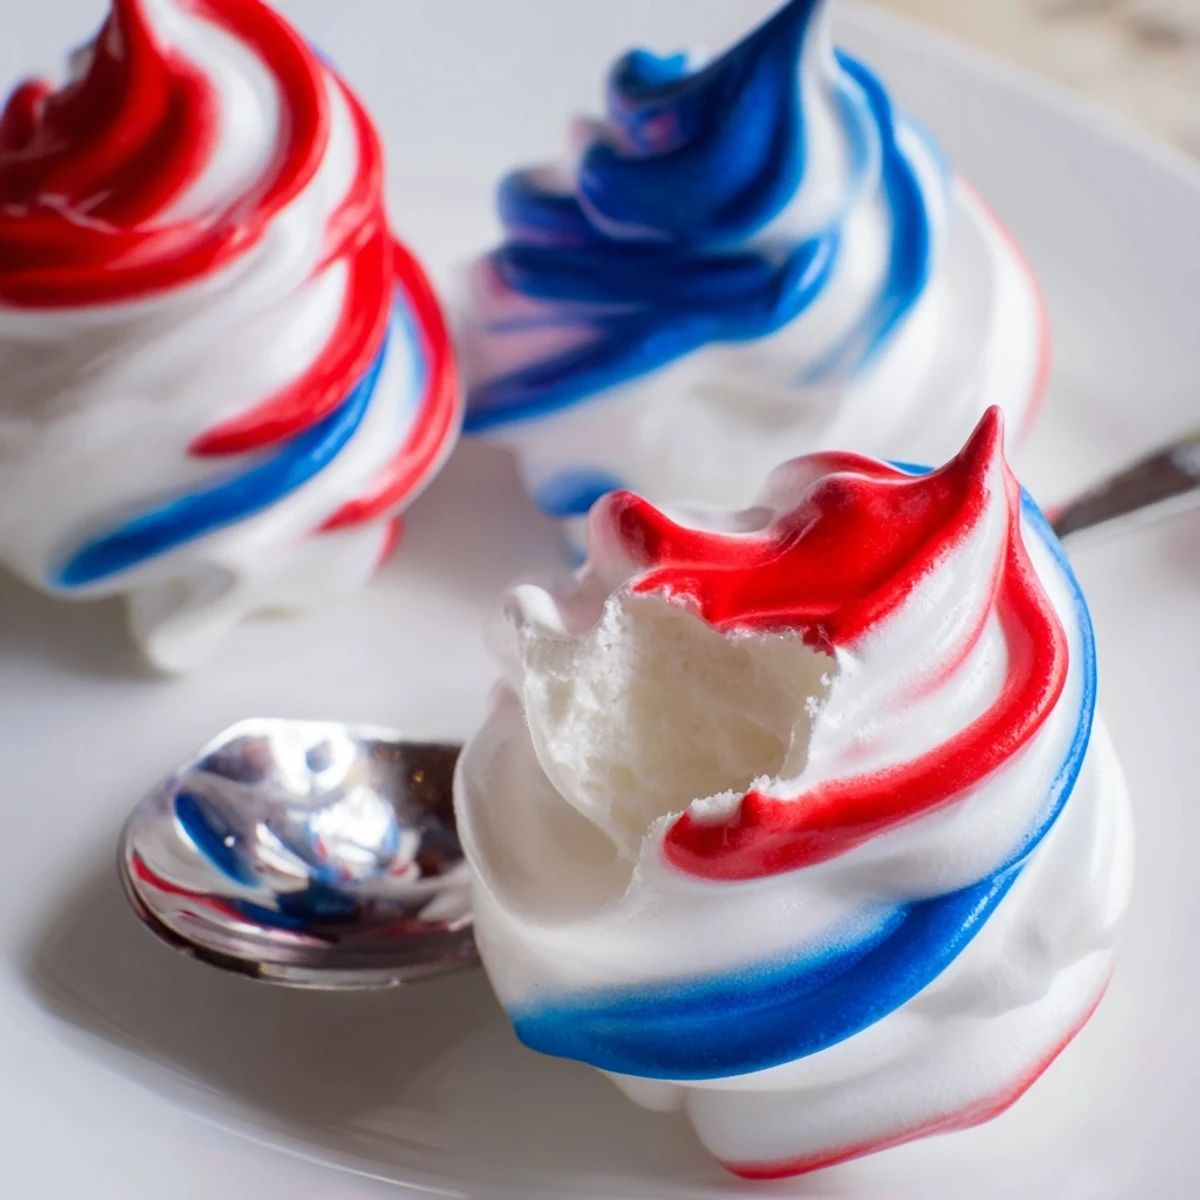
- Red & blue gel food coloring: Using gel ensures bright, bold streaks without watering down your meringue; painting the stripes in your bag makes every kiss unique.
Instructions
- Prep your scene:
- Preheat the oven to 200°F (90°C) and line your baking sheets, letting parchment flap gently onto the counter—it's always a little crinkly but that's part of the ritual.
- Whip up the base:
- Combine egg whites and cream of tartar in a sparkling clean bowl (not even a whisper of grease), and beat until they start to look like billowy clouds with soft peaks.
- Sugar clouds:
- Add sugar one spoonful at a time, listening for the shift in sound—when it starts to hush and thicken, that’s your cue the magic’s happening. Continue until glossy, stiff peaks stand tall—if you turn the bowl, they shouldn't budge.
- Flavors in:
- Add salt and vanilla and give it a quick final mix until just incorporated—you'll see the meringue looks luxurious and smells like marshmallow fluff.
- Stripe the bag:
- Paint bold red and blue stripes with a small food brush inside your piping bag, leaving a gap for the white—think of it like a flag in dessert form.
- Bag and pipe:
- Spoon the meringue in gently, twisting the top closed. Pipe effortless kiss mounds onto your baking sheets—they’ll emerge with swirl after whimsical swirl.
- Oven magic:
- Bake for 1 hour 15 minutes, then let cool inside the oven with the door closed for that perfect airy crispness—resist the urge to peek, the wait is part of the fun.
- Enjoy and store:
- When completely cool, gently peel them away and keep in an airtight container—if any survive that long.
 Save
Save The day my little niece reached for her first meringue kiss, she hesitated—the swirl seemed almost too pretty to eat. The look of surprise on her face as the shell dissolved into sweetness is still one of my favorite kitchen memories. In that moment, I remembered how food can be as playful as it is delicious.
Letting Your Colors Shine
It took me a couple tries to get bold, defined color streaks—the secret is using gel food coloring and not over-mixing once it’s in the bag. You might get a little food coloring on your fingers, but it’s a fun sign you’re going all in. Each batch looks a little different, and that’s what keeps me coming back to this recipe.
Troubleshooting the Perfect Kiss
Humidity can be sneaky—those damp summer days sometimes make meringue feel impossibly sticky. I’ve found that running a dehumidifier nearby helps, or even just waiting for a dry afternoon. If your first try isn’t perfect, remember that a slightly sticky center still tastes like a sweet secret.
Decorating and Serving Ideas
Arranging these meringue kisses on a tiered platter instantly dresses up any party table, whether you're celebrating Independence Day or just craving something cheerful. I sometimes package them in small jars with ribbon for last-minute gifts—everyone’s eyes light up at the surprise colors inside. And don’t limit yourself: pastel streaks work for Spring, and chocolate drizzle turns them into winter wonders.
- Try sparkling sugars for a little extra dazzle.
- Pair two kisses with jam for a sandwich treat.
- Store in a cool, dry place to keep them crisp longer.
 Save
Save Making these swirled meringue kisses is as much about celebrating color as it is sharing sweetness. I hope your kitchen feels just as bright and lively, and your friends grab extras for the road.
Recipe Questions
- → How do I achieve glossy, stiff peaks?
-
Start with room-temperature egg whites and a completely grease-free bowl and whisk. Add cream of tartar to stabilize, then add sugar gradually while beating on high. Continue until peaks are stiff and the mixture is glossy—usually 5–7 minutes with an electric mixer.
- → Why bake meringues at a very low temperature for a long time?
-
Low, slow baking dries the meringues rather than browning them. This method removes moisture evenly so the centers become fully dry and the exterior stays crisp without cracking or coloring.
- → What’s the best way to create the red, white, and blue stripes in the piping bag?
-
Use concentrated gel color for vivid hues. Paint narrow stripes of red and blue inside the bag with a small food-safe brush, leaving a plain section for white. Add the meringue gently to avoid smudging the lines, then pipe immediately.
- → How should I store the meringue kisses so they remain crisp?
-
Once completely cooled and dry, store them in an airtight container at room temperature away from humidity. Use silica packets if your storage area is damp; avoid refrigeration, which can introduce moisture and make them chewy.
- → What causes sticky or weeping meringues and how can I fix it?
-
High humidity, underbaking, or sugar not fully dissolved can cause stickiness. If sticky, return the meringues to a very low oven to dry further, and ensure sugar is fully incorporated during whipping next time.
- → Can I vary flavors or colors without affecting texture?
-
Yes. Swap vanilla for citrus zest or extracts, and use powdered or gel colors sparingly. Avoid adding liquid ingredients that can destabilize the foam; use concentrated pastes or dry flavorings to keep the structure firm.