 Save
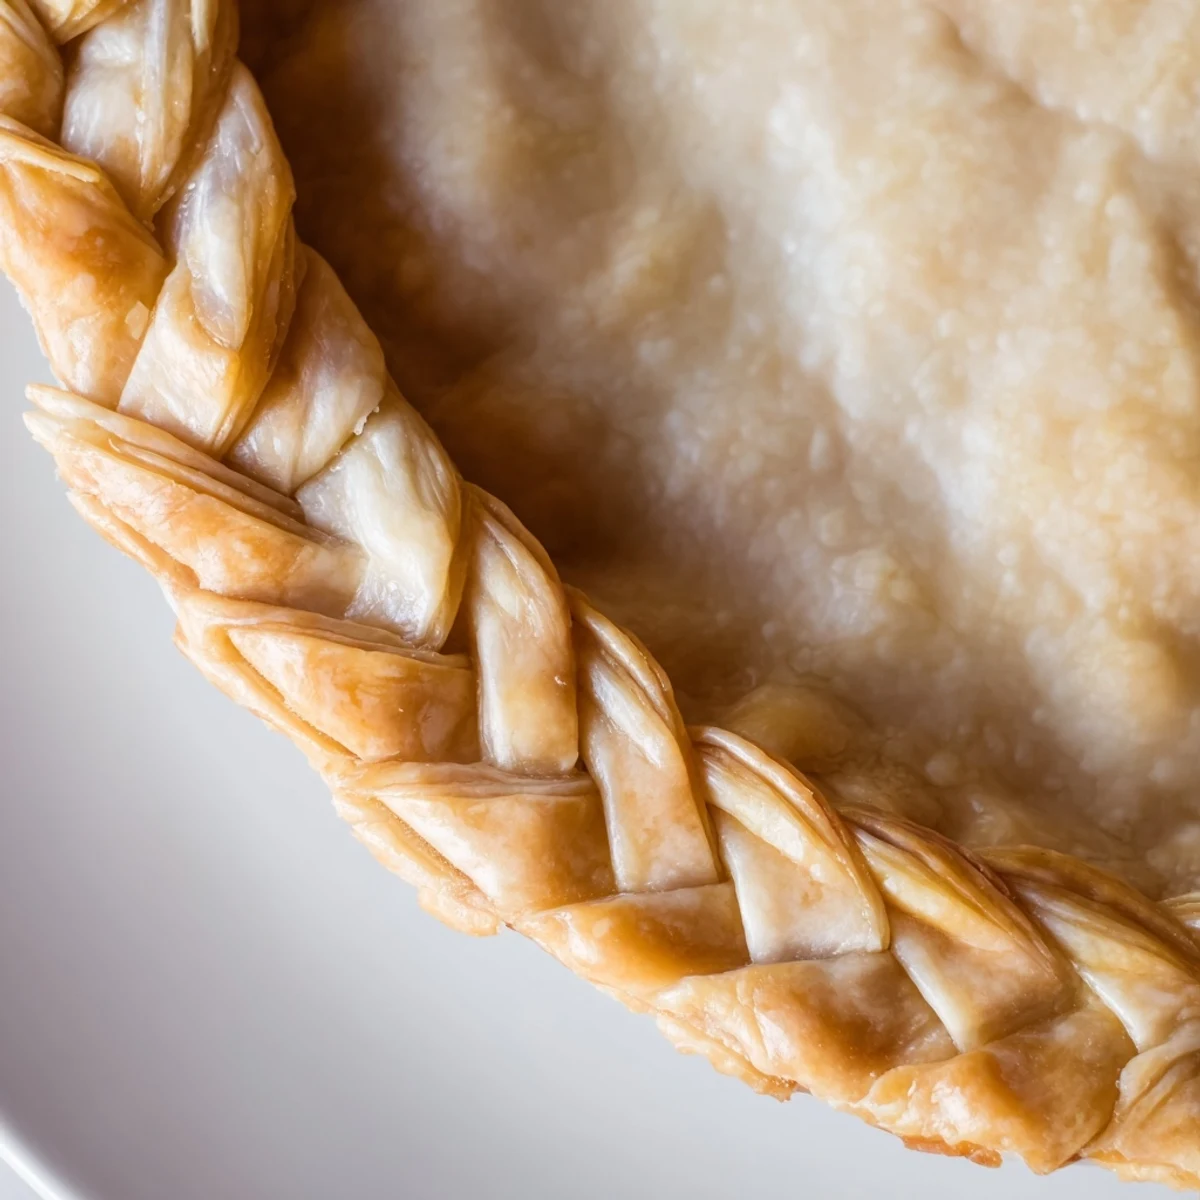
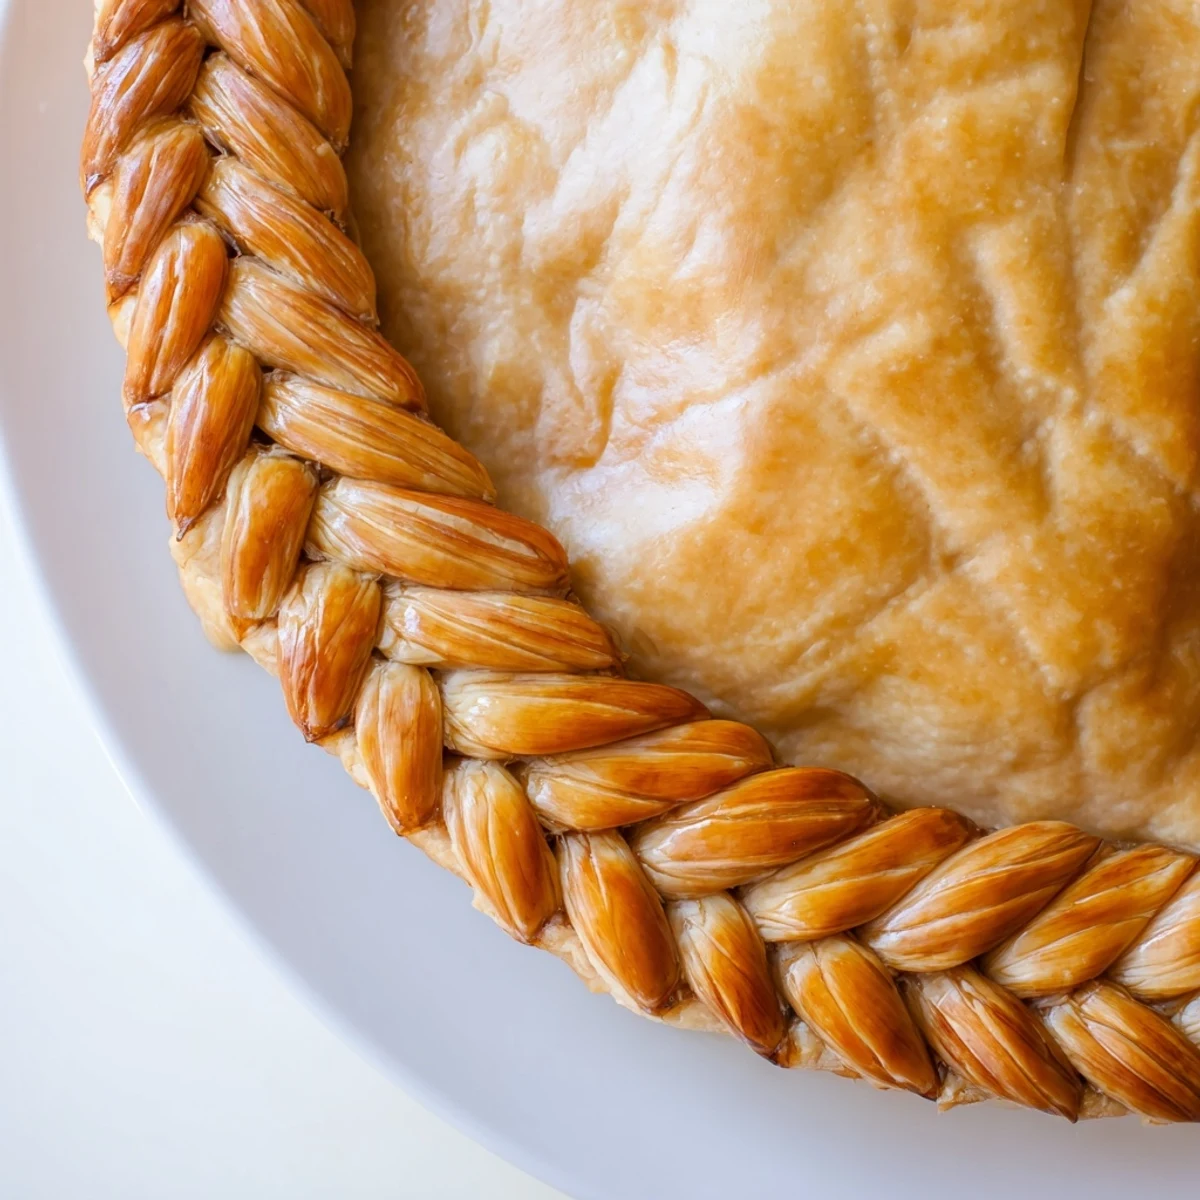
Save Transform ordinary pies into showstoppers with this elegant fishtail braid crust technique. The method involves preparing a classic buttery dough, cutting it into strips, and weaving them into a decorative braid that adorns the pie edge. Perfect for both sweet fruit fillings and savory creations, this visually striking crust requires just basic pastry skills and patience. The result is a professional-looking edge that bakery enthusiasts will appreciate. Total hands-on time is about 30 minutes, plus chilling periods for optimal texture.
My sister called me at 11 PM the night before Thanksgiving, panicked because she'd volunteered to bring dessert but wanted it to look spectacular. I told her about the fishtail braid crust I'd been experimenting with, and somehow we spent three hours on FaceTime while I walked her through the braiding technique in her dim kitchen. Her pie wasn't perfect, but it was beautiful.
I first attempted this technique during a rainy Sunday baking session, convinced I needed to impress new dinner guests. The kitchen was filled with the scent of butter and flour, and I may have played the same folk album on repeat four times while I practiced. Those guests are still married, and they still talk about that pie crust.
Ingredients
- 2 1/2 cups all-purpose flour: The backbone of your crust, providing structure and that tender flakiness we all crave
- 1 cup cold unsalted butter: Keep this ice cold, cubes straight from the fridge, because butter creates those magical layers that separate during baking
- 1 tsp salt: Enhances flavor and strengthens the gluten structure just enough to handle all that braiding
- 1 tbsp sugar: A subtle sweetness that helps with browning and balances savory fillings beautifully
- 6-8 tbsp ice water: Add this gradually, watching how your dough responds, because humidity affects everything
- 1 egg beaten with 1 tbsp milk: The golden finish that makes your braided crust glow and catch everyone's eye
Instructions
- Mix your foundation:
- Whisk flour, salt, and sugar in a large bowl until combined, then work in cold butter until you see pea-sized pieces scattered throughout like tiny treasures
- Bring it together:
- Drizzle ice water while gently tossing with your hands, squeezing a handful to see if it holds, then divide into two discs and wrap for at least an hour in the fridge
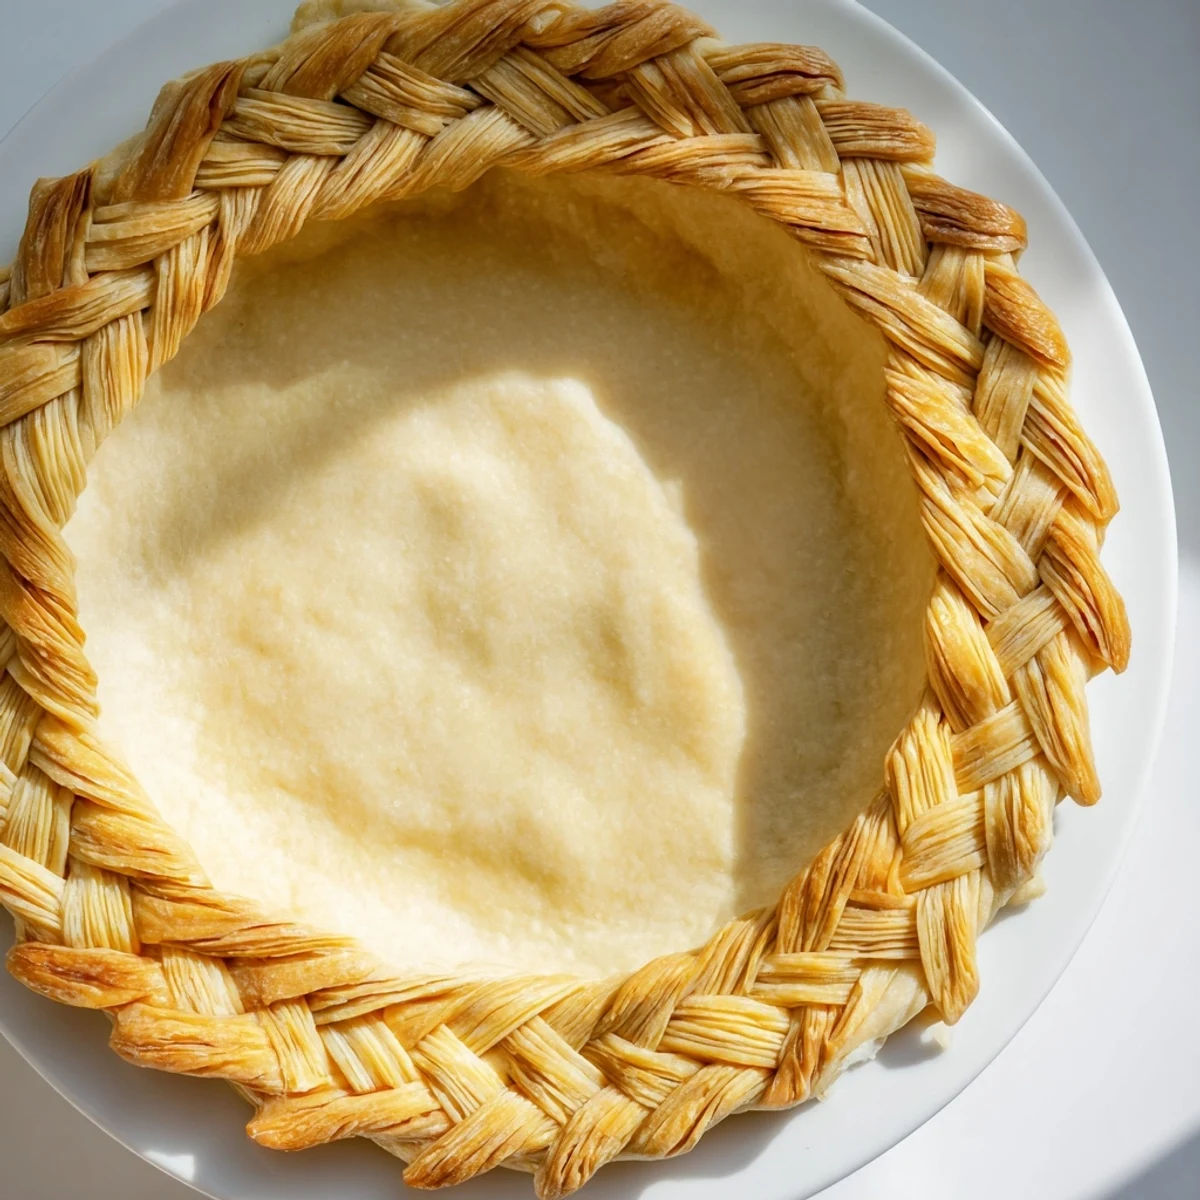
- Prepare your canvas:
- Roll one disc to fit your pie plate, press it in gently like you're tucking in a blanket, trim the edges, and return to the refrigerator while you work your magic
- Create your strips:
- Roll the second disc to about 1/4 inch thickness and cut twelve long, even strips, grouping them into sets of four and pinching their tops together like little wheat bundles
- Master the fishtail:
- Label your strips left to right as 1, 2, 3, 4, then cross strip 1 over 2, under 3, and over 4, repeating with the new leftmost strip until you've braided to the end
- Finish with flair:
- Transfer your braids to the chilled pie edge, pressing gently and using water as glue if needed, then chill 15 minutes before brushing with egg wash and baking at 400°F until golden and gorgeous
 Save
Save That first imperfect pie became a tradition, and now I can't imagine serving a holiday pie without its crown of braiding. Something about taking the time to weave each strand makes the whole experience feel sacred, like you're pouring love into every loop and tuck.
Temperature Control
Cold ingredients are your best friends in pastry making, and I've learned this through too many tough, shrinkage-prone crusts. Keep your butter in the freezer until the moment you need it, and consider chilling your flour and even your bowl if you're working in a warm kitchen.
Braid Variations
Once you master the four-strand fishtail, try experimenting with different widths or even mixing colors by adding beet juice or turmeric to portions of your dough. I've seen beautiful variations where bakers create ombré effects or twist in herbs for savory applications.
Storage and Make-Ahead
You can prepare the braided crust up to 24 hours in advance, wrapping it tightly and keeping it chilled until you're ready to bake. The flavor actually develops beautifully during this rest, giving you a head start on holiday prep.
- Freeze unbaked braided crusts for up to 3 months, wrapping them like precious gifts
- If freezing, bake directly from frozen, adding a few extra minutes to ensure the bottom is fully crisp
- Leftover baked crust keeps at room temperature for 2 days, though it rarely lasts that long
 Save
Save The most important ingredient here isn't flour or butter, it's patience with yourself as you learn something that feels intimidating. Your imperfect first attempt will still taste incredible.
Recipe Questions
- → Can I make the dough ahead of time?
-
Absolutely. The dough discs can be wrapped tightly and refrigerated for up to 3 days or frozen for up to 3 months. Thaw overnight in the refrigerator before rolling and braiding.
- → What if my braids break during assembly?
-
Don't worry—small breaks can be pressed back together with a bit of water. Work with cold dough and handle strips gently. If braids feel too soft, chill the assembled crust for 15-20 minutes before baking.
- → Can I use store-bought dough?
-
Yes, refrigerated pie dough works well. Let it thaw slightly, then proceed with cutting and braiding. You may need to roll it slightly thinner for easier weaving.
- → Do I need to blind bake this crust?
-
Blind baking helps the decorative edge hold its shape, especially for custard or wet fillings. For fruit pies with longer baking times, you can skip this step and bake everything together.
- → Can I make different braid variations?
-
Certainly! Try a standard three-strand braid for a simpler look, or create multiple smaller braids and place them around the edge. You can also weave the strips directly on the pie without pre-braiding.
- → How do I prevent the braid from burning?
-
The egg wash promotes even browning, but watch closely after 12 minutes. If edges brown too quickly, cover gently with foil. A pie shield also works well to protect the decorative edge.